Wednesday, September 28, 2016

Sitecore Command Template

Hi All,

Today we discuss about command template.
Command Template: allow insert of items according to logic rather than predefined structures.
Command template define a class and method to be called during an insert operation. Unlike data templates and branch templates, which consist of predefined structures, command templates reference Sitecore UI commands to invoke wizards or other logic used to create new items.


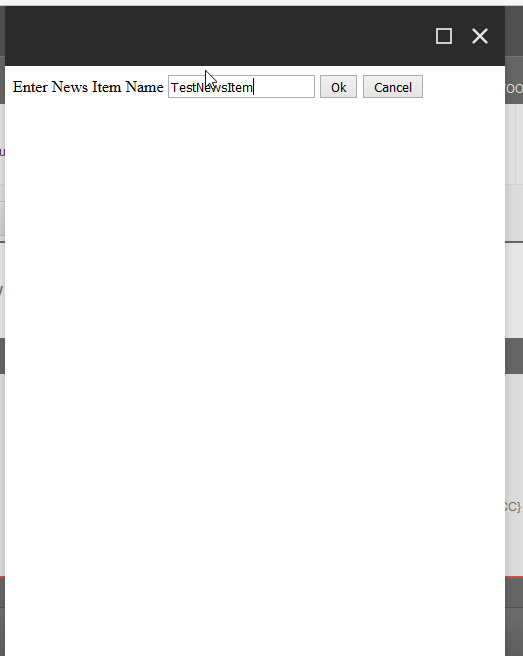
We can create a command template that displays no user interface, a command template that uses a JavaScript prompt to collect an item name, or a command template that displays an ASP.NET or Sitecore Sheer user interface.

We can assign command templates along with data templates and branch templates using insert options.
Following example demonstrates creation of a command template which would check if a folder with current year name exists under main item “News”  and add a “News Item” in that folder. This example uses a JavaScript prompt to collect News Item name.

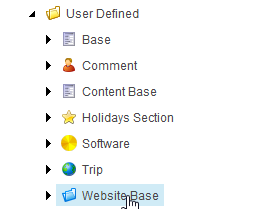
Step 1: Create two templates “News” & “News Item” with required fields.

Step 2: Create a class that inherits from Sitecore.Shell.Framework.Commands.Command, and override the Execute() method.

namespace BasicSitecore.Custom_Code
{
    public class NewsItemCommand : Sitecore.Shell.Framework.Commands.Command
    {
        public override void Execute(Sitecore.Shell.Framework.Commands.CommandContext context)
        {
        }
    }
}

Step 3: Add a /configuration/command element to the file /App_Config/Commands.config.


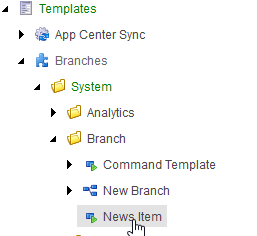
Step 4: Insert a command template definition item using /System/Branches/Command Template data template.


Step 5: In the command template definition item, in the Data section, for the Command field, enter the command code.


The parameter id=$ParentID passes the ID of the item under which the user is inserting a new item. Without this parameter, Sitecore would pass the ID of the selected item rather than the item the user right-clicked.

Step 6: Assign this command template to standard values of the “News” template insert option created in step1.


Step 7: Create a new aspx page in “/sitecore modules/shell” With name News.aspx because we give reference of this page in command class code.


Step 8: Complete required code in the command class.

public override void Execute(Sitecore.Shell.Framework.Commands.CommandContext context)
        {
            if (context.Items != null && context.Items.Length > 0)
            {
                Item contextItem = context.Items[0];
                NameValueCollection parameters = new NameValueCollection();
                parameters["id"] = contextItem.ID.ToString();
                parameters["name"] = contextItem.Name;
                parameters["database"] = contextItem.Database.Name;
                parameters["language"] = contextItem.Language.ToString();
                Sitecore.Context.ClientPage.Start(this,"Run", parameters);//Run method executes on

            }
        }
        protected void Run(Sitecore.Web.UI.Sheer.ClientPipelineArgs args)
        {
            if (args.IsPostBack)
            {
                if (!(String.IsNullOrEmpty(args.Result)) && (args.Result != "undefined") && (args.Result != "null"))
                {
                }
            }
            else
            {
                Sitecore.Text.UrlString url = new Sitecore.Text.UrlString("/sitecore modules/shell/News.aspx");
                url.Append("id", args.Parameters["id"]);
                url.Append("database", args.Parameters["database"]);
                Sitecore.Context.ClientPage.ClientResponse.ShowModalDialog(url.ToString(), true);
                args.WaitForPostBack(true);
            }
        }   

Step 9: Handle “OK” and “Cancel” buttons of the user interface News.aspx

protected void btnOK_Click(object sender, EventArgs e)
        {
            if (! String.IsNullOrEmpty(txtNewsItem.Text))
            {
                Sitecore.Data.Database currentDatabase = Sitecore.Configuration.Factory.GetDatabase(Sitecore.Web.WebUtil.GetQueryString("database"));
                Item parentItem = currentDatabase.GetItem(Sitecore.Web.WebUtil.GetQueryString("id"));
                if (parentItem != null)
                {
                    //check if News item contains a folder with current year
                    Item[] children = parentItem.Axes.GetDescendants();
                    Item currentYearItem = children.Where(x => x.TemplateName == "Folder" && x.Name == DateTime.Now.Year.ToString()).SingleOrDefault();
                    if (currentYearItem == null)
                    {
                        Sitecore.Data.Items.TemplateItem folderTemplate = currentDatabase.GetTemplate(Sitecore.TemplateIDs.Folder);
                        if (folderTemplate != null)
                        {
                            Item i = parentItem.Add(DateTime.Now.Year.ToString(), folderTemplate);
                            currentYearItem = i;
                        }
                    }
                    //create a news item and add it to the current folder
//Enter your template ID for news item
                    Sitecore.Data.Items.TemplateItem newsItemTemplate = currentDatabase.GetTemplate(new Sitecore.Data.ID("{42B8742F-FD44-4310-8717-39F1CD1EA7F6}"));
                    Item newsItem = currentYearItem.Add(txtNewsItem.Text, newsItemTemplate);
                    ScriptManager.RegisterClientScriptBlock(this, this.GetType(), "Close", "window.top.dialogClose();", true);
                }
            }
            else
            {
                ScriptManager.RegisterClientScriptBlock(this, this.GetType(), "Warning", "alert('Please enter news item');", true);
            }
        }
        protected void btnCancel_Click(object sender, EventArgs e)
        {
            ScriptManager.RegisterClientScriptBlock(this, this.GetType(), "Close", "window.top.dialogClose();", true);
        }

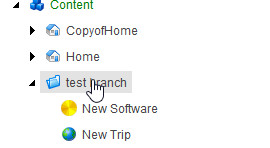
Step 10: Create a main news item based on “News” template.

Step 11: Create a news item under main item by clicking the command template which would create a folder with current year and a “News Item” under that folder.


Helpful link or references:
http://techblogsearch.com/a/example-of-sitecore-command-template-with-user-interface.html
http://sitecoreworld.blogspot.in/2014/09/example-of-sitecore-command-template_21.html


How Use Branch Templates in Sitecore CMS

Hi All,
Today we discuss about Branch template in sitecore.
At first question come in mind what is Branch template.

Template defines the fields and sections associated with a type of item. Items in sitecore can be created using three different template types.

·         Data Template:  form the framework around which items are built. They define fields used to control how data is entered and can inherit from other templates to enable reuse.

·         Branch Template: allow you to create a set of items rather than a single item at a time.

·         Command Template: allow insert of items according to logic rather than predefined structures.

Data Template: A data template defines a data type. Sitecore associates a data template with each item. The data template defines the structure of all items associated with that data template. A data template contains a number of data template sections, each of which contains a number of data template fields.

Branch Template: A branch template consists of a branch template definition item, which can contain a single item, a hierarchy of items, or multiple hierarchies of items. When a user invokes a branch template, Sitecore duplicates the item(s) beneath the branch template definition item, including any field values, and then performs token substitution on item names and field values.

Steps for creating brach template:
1. At first navigate to "/sitecore/templates/User Defined" or "/sitecore/templates" create a template which is the base for branch template or either you can select folder(/sitecore/templates/Common/Folder) for that as well if you don't wanna create any template for that.
In my case I create a "Website Base" template that inherit the base template of website and give the blue folder icon that give unique look to my branch template.


2. Then navigate to "/sitecore/templates/Branches/User Defined"
3. Under this node either create new branch template directly or create a separate folder then create branch template inside.
4. Right click and select "New Branch" option.
5. Select the template for that in my case "Website Base" or if you don't create any then select Folder(/sitecore/templates/Common/Folder).
6. A new branch template item will have been created including a Website Base item name $name.
7. $name is token that is replaced by selected name when branch template used.
8. Under $name item create a tree structure that you wanna create from branch template.

9. For creating item under sitecore/content node, right click and select insert from template.
10. navigate to branch template and select that and give suitable name. A tree structure as you described in branch template automatically created. 


Here are the helpful links:
https://www.geekhive.com/buzz/post/2015/02/how-to-create-branch-templates-in-sitecore-cms/
http://sitecoreworld.blogspot.in/2014/09/sitecore-branch-template-example.html


Friday, September 23, 2016

Create saas folder structure for grunt by self destructive bat file

Hi All,

For Creating the standard Fronted folder structure for using saas by using grunt.
For create the folder structure do following steps:
1. At first copy the below text.

md frontend\dist\fonts
md frontend\dist\img
md frontend\dist\js
md frontend\dist\css
md frontend\grunt\configs
md frontend\grunt\tasks
md frontend\src\fonts
md frontend\src\img
md frontend\src\js
md frontend\src\scss
echo.>frontend\Gruntfile.js
echo.>frontend\package.json
echo grunt watch >> frontend\grunt-start.bat

2. Paste into a .bat extension file. like: Fronteded.bat
3. Run the "Fronteded.bat" where you want to create Frontended folder.
4. This "Fronteded.bat" file auto delete and basic structure created.

You can found sample bat file here

TDS for Code Generation

Hi All,
Today we discuss about how generate code for templates from TDS via glass mapper.
At first thanks for this artice which make a clear picture about that link is here.

Configuring TDS with GlassMapper

Open up the TDS properties dialog. You can do this by right-clicking on your TDS project in solution explorer and select ‘Properties’ from the context menu.

Go to the ‘Code Generation’ tab. This is the area that you can configure TDS with Glassmapper. You will need to add in the following properties:
  • Enable Code Generation Checkbox
  • Select the target project (this is the website or class library you want the generated classes to live)
  • Add in the Folder, class name and .cs extension (be sure to use the right \ otherwise TDS will moan
  • Add in the namespace
After filling in these details, select ‘Save’. When you look within solution explorer in your TDS project you should now see a new folder called ‘Code Generation Templates’.


In here you need to add some custom Sitecore transformation files, known as T4 templates. These T4 templates can be thought of like the instruction manual to tell GlassMapper how to convert Sitecore data in C# classes. These files are the bit that create the ‘magic’ auto code generation. You can get the templates here. Download the following three files:
  • Helpers.tt
  • GlassV3Header.tt
  • GlassV3Item.tt
  • GeneralExtensions.tt
  • Inflector.tt
  • StringExtensions.tt
Do not use Github’s ‘Download It’ option. Add the templates and include them to your Visual Studio project file. Go back to the TDS properties -> Code Generation’ section. You now need to configure the ‘Header Transform File’ and the ‘Base Project Transform File’
Header Transform File -> GlassV3Header.tt
Base Project Transform File -> GlassV3Item.tt

When you save the project the file you specified in the target path should be generated with some code, mine looked like this:


namespace GlassMapperModels
{
    public partial interface IGlassBase{
         
        [SitecoreId]
        Guid Id{ get; }
        [SitecoreInfo(SitecoreInfoType.Language)]
        Language Language{ get; }
        [SitecoreInfo(SitecoreInfoType.Version)]
        int Version { get; }
    }
    public abstract partial class GlassBase : IGlassBase{
         
        [SitecoreId]
        public virtual Guid Id{ get; private set;}
        [SitecoreInfo(SitecoreInfoType.Language)]
        public virtual Language Language{ get; private set; }
        [SitecoreInfo(SitecoreInfoType.Version)]
        public virtual int Version { get; private set; }
        [SitecoreInfo(SitecoreInfoType.Url)]
        public virtual string Url { get; private set; }
    }
}

Note: Please have a look on below url if you faces any issue regarding t4 template.
https://www.teamdevelopmentforsitecore.com/Blog/t4-transform-file-problems-code-gen

I hope you enjoy this Sitecore blog. Stay tuned for more Sitecore related articles.

Till that happy Sitecoring :)

Please leave your comments or share this article if it’s useful for you.

Thursday, September 1, 2016

RSS Feeds in Sitecore

Hi All,
Today we discuss about RSS field in Sitecore.
RSS feeds are basically used for create xml file of items that we want to use in another websites for getting the information about those items.

RSS (Rich Site Summary; originally RDF Site Summary; often called Really Simple Syndication) uses a family of standard web feed formats to publish frequently updated information: blog entries, news headlines, audio, video.


By using below url you can found how use RSS feeds in sitecore.
For explore the xml you just need to open RSS item.
Note:Firefox not show in proper way open in chrome for view xml format.

For Adding the additional fields in RSS follow:
In below blog in place of Image pass your field name in pipe line.
https://sitecorejunkie.com/2014/11/03/add-additional-item-fields-to-rss-feeds-generated-by-sitecore/


References:https://doc.sitecore.net/sitecore_experience_platform/content_authoring/managing_items/rss_feeds/walkthrough_setting_up_rss_feeds
http://getfishtank.ca/blog/create-rss-feeds-in-sitecore

https://sitecorejunkie.com/2014/11/03/add-additional-item-fields-to-rss-feeds-generated-by-sitecore/